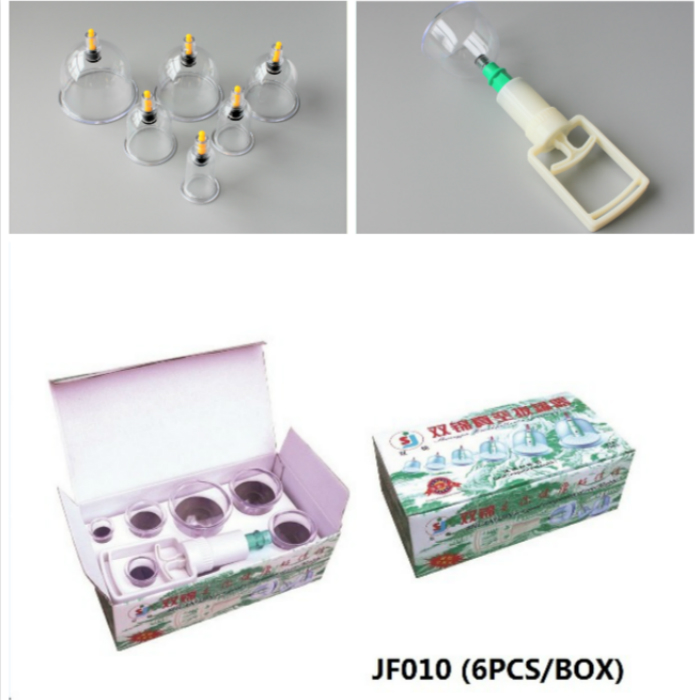
How to use Vacuum Cupping ?

Vacuum cupping mainly produces therapeutic effects by extracting gas from the can, forming negative pressure. The treatment principle is the same as cupping. But compared to cupping, vacuum cupping is simple to operate, convenient to use, and does not cause burns. Vacuum cupping can cause local tissue congestion, vascular dilation, and accelerated blood circulation, thereby dredging meridians, promoting qi and blood circulation, promoting blood circulation and removing stasis, reducing swelling and pain, accelerating metabolism, and facilitating the elimination of toxins in the body, thus achieving the effect of disease prevention and treatment.
Usage: Select a suitable size can and a comfortable position, lift the top piston of the selected can to ensure ventilation. Gently wrap the vacuum gun mouth around the top piston of the can, and vertically and quickly lift and pull the rod several times until the skin at the cupping area is raised, which the patient can tolerate. After the can is adsorbed on the surface of the body, gently rotate the negative pressure gun mouth left and right back, and gently press the can piston to prevent air leakage; At the end of the treatment, simply lift the top piston of the jar, and each treatment lasts for 10 minutes. Connectors can be used in areas where individual cupping is not possible (such as the spine or waist).
1. Select the appropriate acupoints based on the condition, and refer to the acupoints indicated in the acupoint selection diagram for treatment. The acupoints are located on the midline of the human body, namely Ren and Du meridians, and are a single acupoint. The other acupoints are symmetrically arranged. The chart only shows one side, and bilateral acupoints should be taken during treatment. When selecting acupoints, they can be divided into two groups according to the acupoints listed in the treatment reference, and one group can be rotated daily for use.
2. Choose appropriate jars and comfortable positions (which can be divided into sitting, supine, lateral, and prone positions).
3. Lift the top piston of the selected container to ensure ventilation.
4. Insert the negative pressure gun muzzle. Gently grip the top piston of the can and quickly lift and pull the rod vertically several times until the skin inside the can protrudes, which the patient can tolerate.
5. Connectors can be used in areas where direct cupping is not possible (such as the spine or waist). Connector installation method: First, connect the large end of the connecting rod at one end of the connector to the large hole of the spare front nozzle, and then connect the small end of the connecting rod at the other end to the negative pressure gun mouth to form a whole. Then, fit the front nozzle with the piston end of the cupping, and place the cupping in the area that needs treatment.
6. After the canister is adsorbed on the body surface, gently rotate the negative pressure gun mouth left and right to move it backwards, and lightly press the canister piston to prevent air leakage.
7. Just lift the piston at the end of the treatment.
8. After using the cupping tool, use disinfectant and alcohol cotton to wipe it regularly. Do not soak, boil or heat treat.
9. During cupping therapy, it cannot be pulled out. Please check whether the rubber plug inside the cupping is tightly sealed, whether the connection between the negative pressure gun and the cupping is too tight, whether the negative pressure gun and the cupping are vertical, and whether there is too much pressure on the skin during cupping and pulling. Precautions for cupping.


 Send Email